Kerberos SSO
Objective
The main aim/objective of this particular authentication is that the user doesn't have to enter its credentials the software will automatically detect from which user group does the user belong and will set the restrictions accordingly.
Overview
After installation of Windows Server and integrating AD with SafeSquid we need to configure the DNS settings in Windows Server. This document will give you the step-by-step instructions on how to configure DNS. After completing this we need to add the same credentials we used while setting up our DNS, into the Browser. Then we will be able to view the user group that we have created, in Developer Tools section in our Browser.
Prerequisite
Microsoft Windows server need to be installed and running on any of the machine. Steps to install Windows Server: Get started with Windows Server 2019 | Microsoft Docs
Microsoft AD needs to be integrated with the SafeSquid for the SSO authentication: Link to do itLink
Client Scenario
Since we want to use FQDN proxy server and not the IP Address format we need to create a new host and assign a required domain name. For this we will go to the AD which we created named 'mann-ad.safesquid.' Create New host and stet its name as 'sabproxy'. In the FQDN we will enter 'sabproxy.mann-ad.safesquid' and IP address as '192.168.56.101'. Now go to the Browser Settings, select Manual Proxy Configuration. Here we will enter HTTPS proxy as sabproxy.mann-ad.safesquid. Now we would be able to see all the created users in Network Tab in Developer Tools.
What is SafeSquid SSO Authentication?
SafeSquid SSO authentication is non-interactive authentication process.
SafeSquid SSO Authentication support is particularly useful for Enterprise networks that have a Microsoft AD based Domain controller.
By properly configuring the necessary Kerberos related factors with SafeSquid, your enterprise Internet users can enjoy SSO Authentication.
SafeSquid SSO authentication ensures that your users do not have to manually provide their user credentials as username / password to access your networked enterprise resources and services, yet their access restricted as specified. SafeSquid SSO authentication, thus not only just adds convenience to the overall user experience, but also enhances security.
Procedure
Step 1: Configure the DNS settings:
If you want to achieve this then you will not be using the IP address: port format. We will be using the FQDN of the proxy server. In order to setup the DNS for the FQDN follow the following steps.
- Open the Server Manager in the Windows Server and click on tools in the top right corner of the Menu.
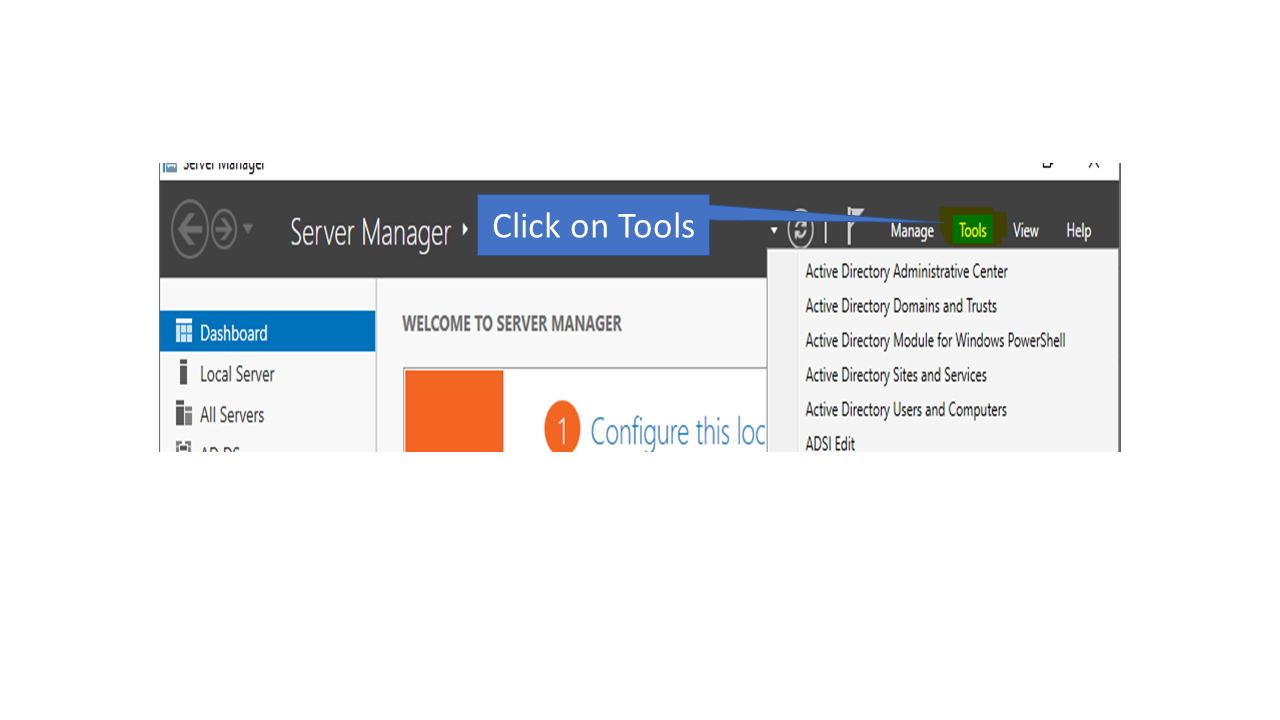
- Now select the DNS option.

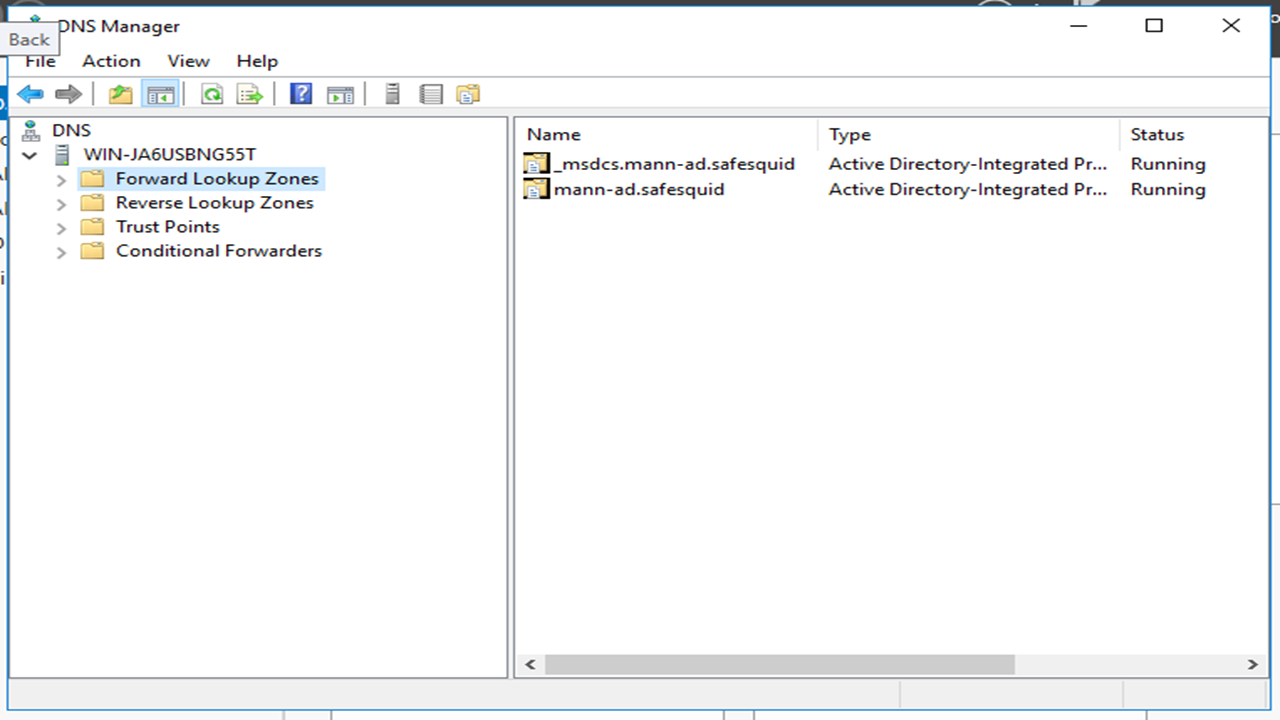
A window like this will appear.
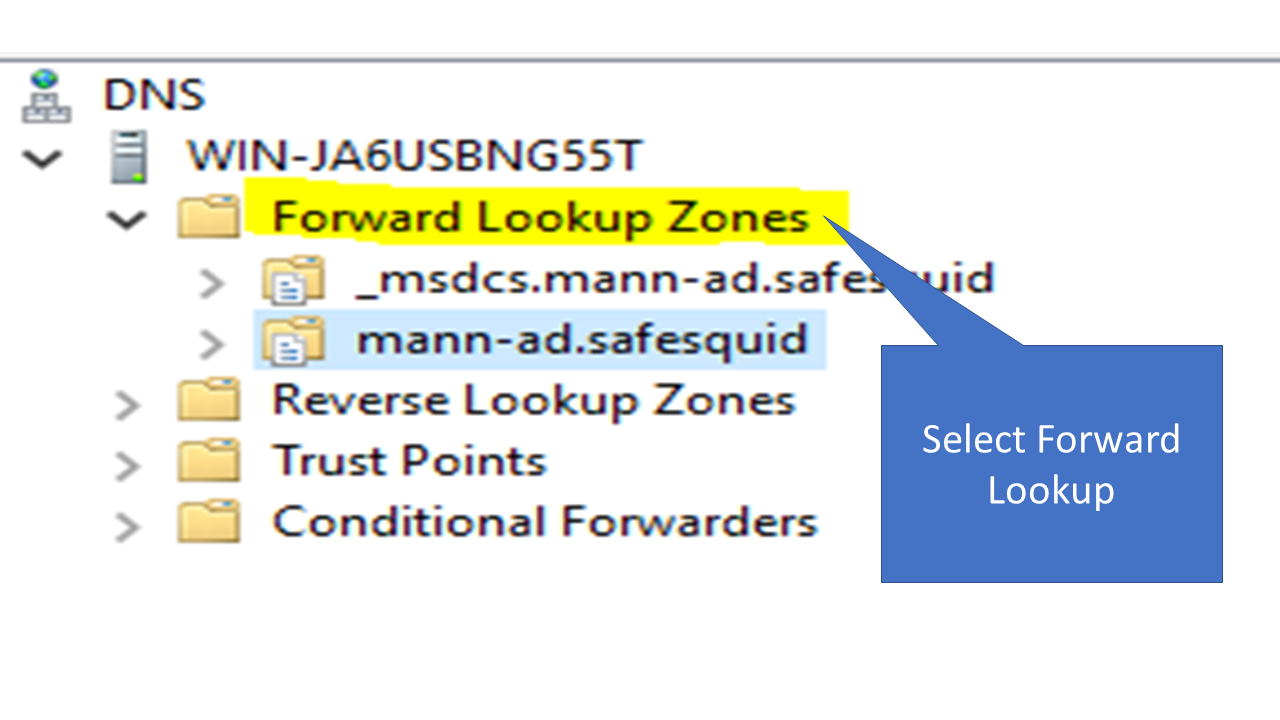
 3. Click on Forward Lookup Zones.
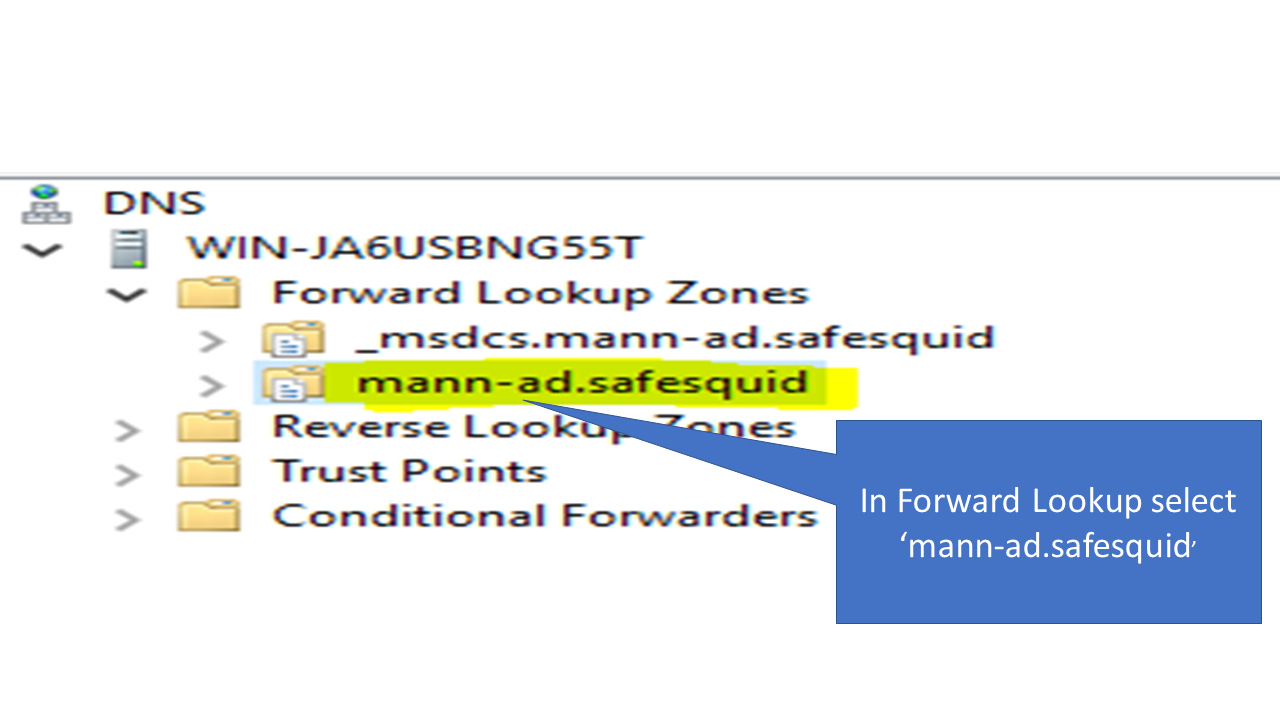
 4. Select the AD which you created or Integrated with the safesquid in my case it is mann-ad.safequid.
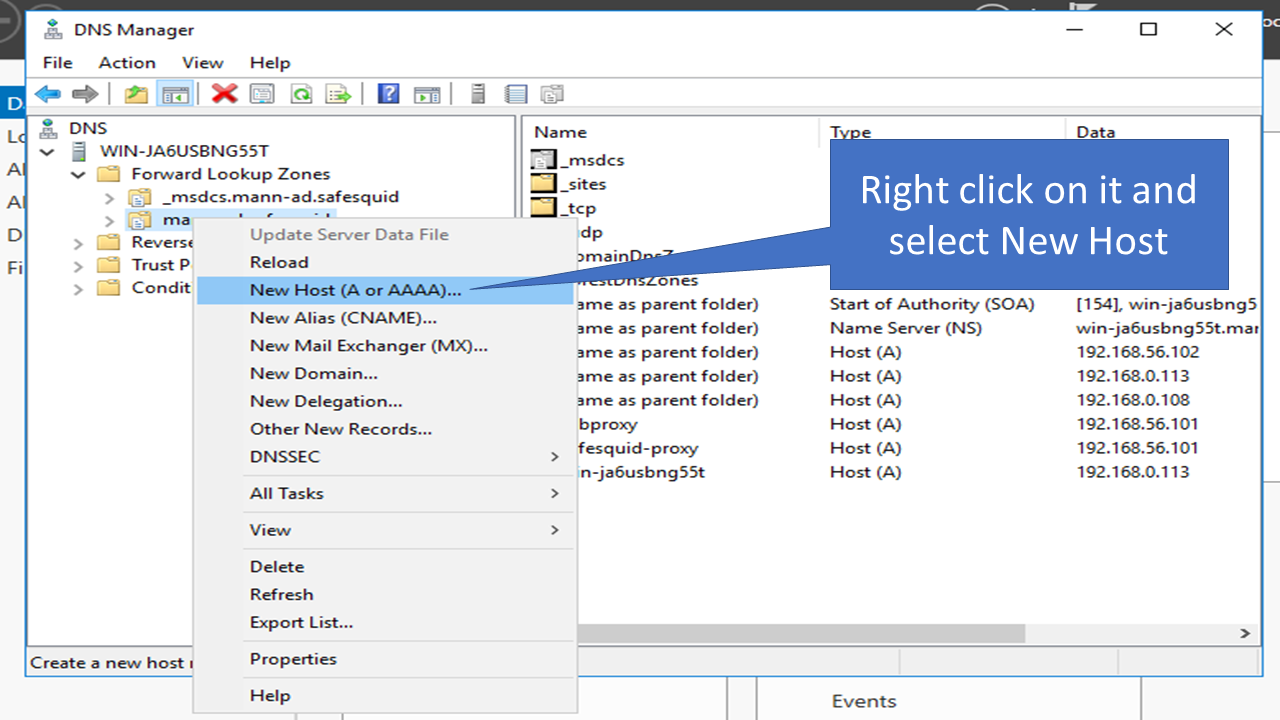
 5. Right click on it and select New Host (A or AAAA).
 6. Now this is the most important step. For this step you need to know your domain name. To find it use hostname -f command in the safesquid machine. You will find your domain name over here. So, domain name in my case is sabproxy.
 7. Enter the following credentials in the fields. Note: The IP address should be the IP of the SafeSquid machine.
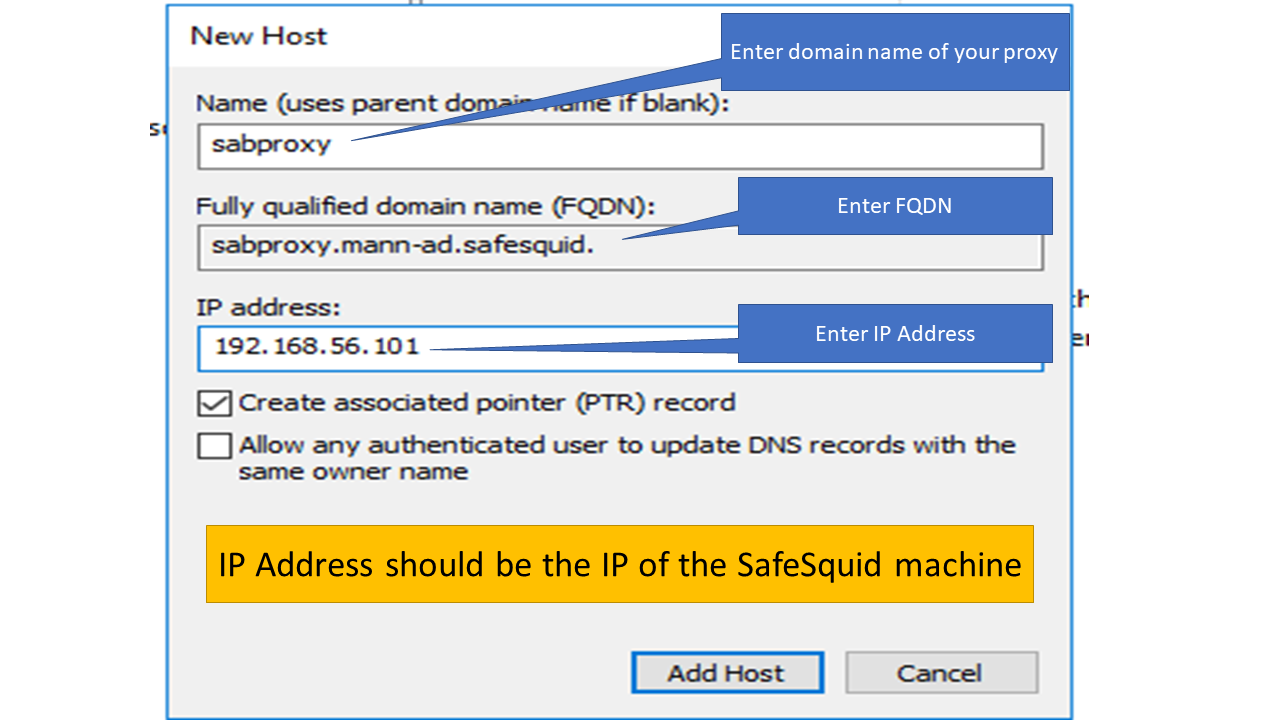 8. Click on Add Host. It will add the DNS host.
Step 2: Configuring Settings in the Browser
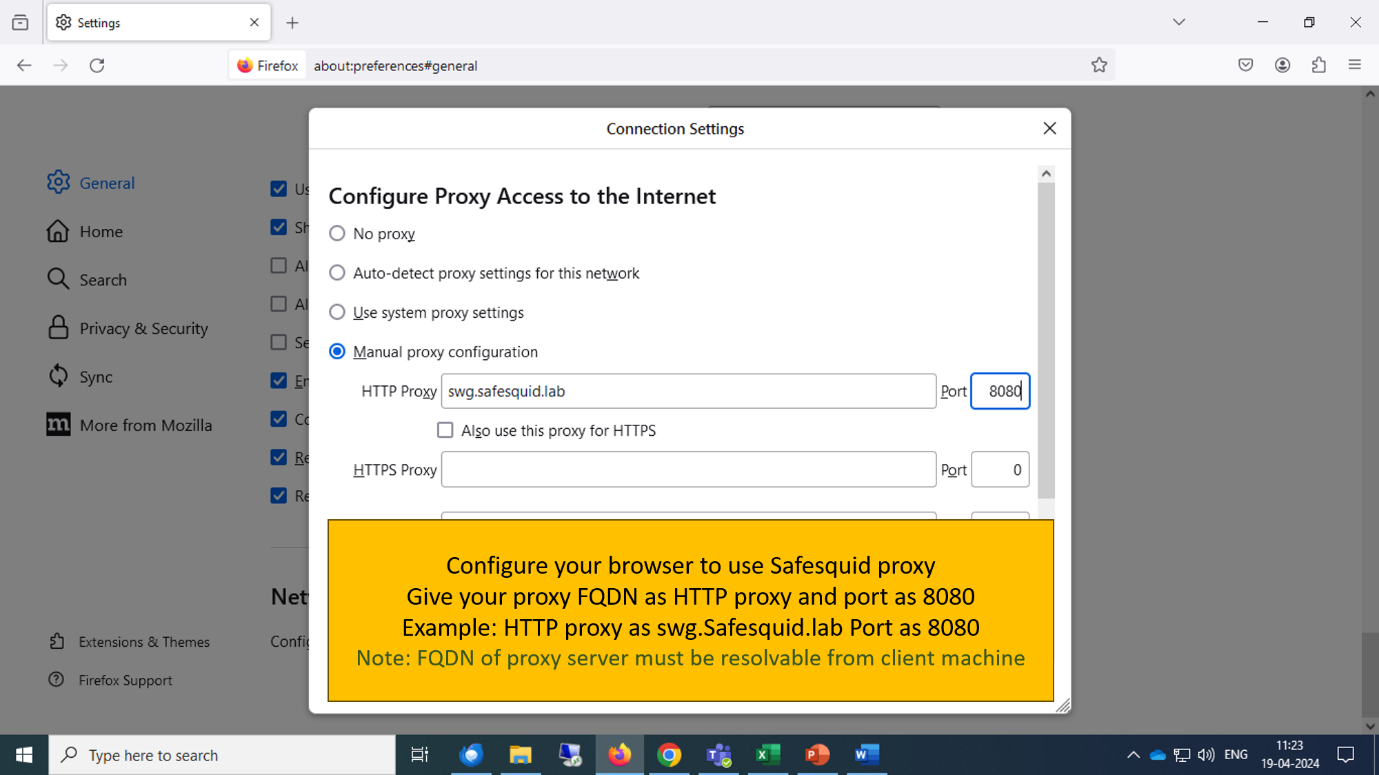
- Now in order to use the proxy open the web browser and go to settings and search for proxy settings.
- Select the manual configuration option. Enter the FQDN which you just created in the step no 7 in the Proxy field and enter 8080 as the port number.
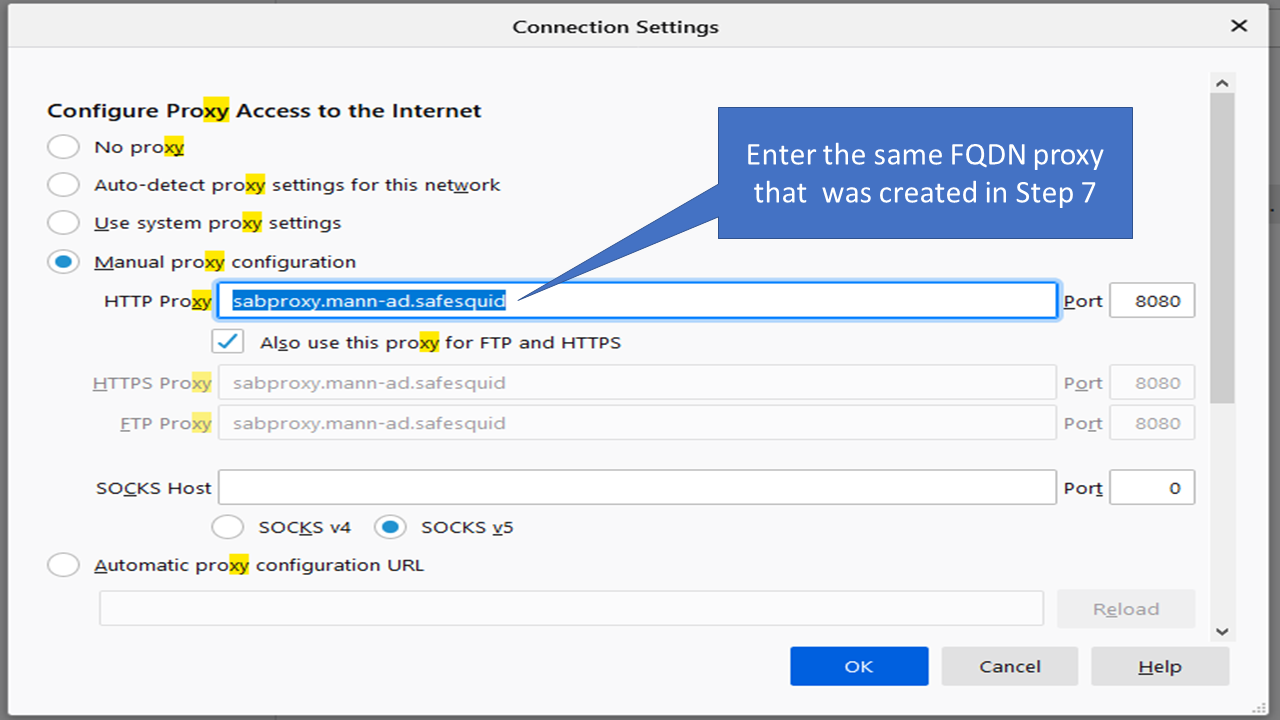
- Click on Okay and restart the browser.
Output
- Now go to any website and right click on it and select on inspect element.

- Select the network option from the navigation menu.
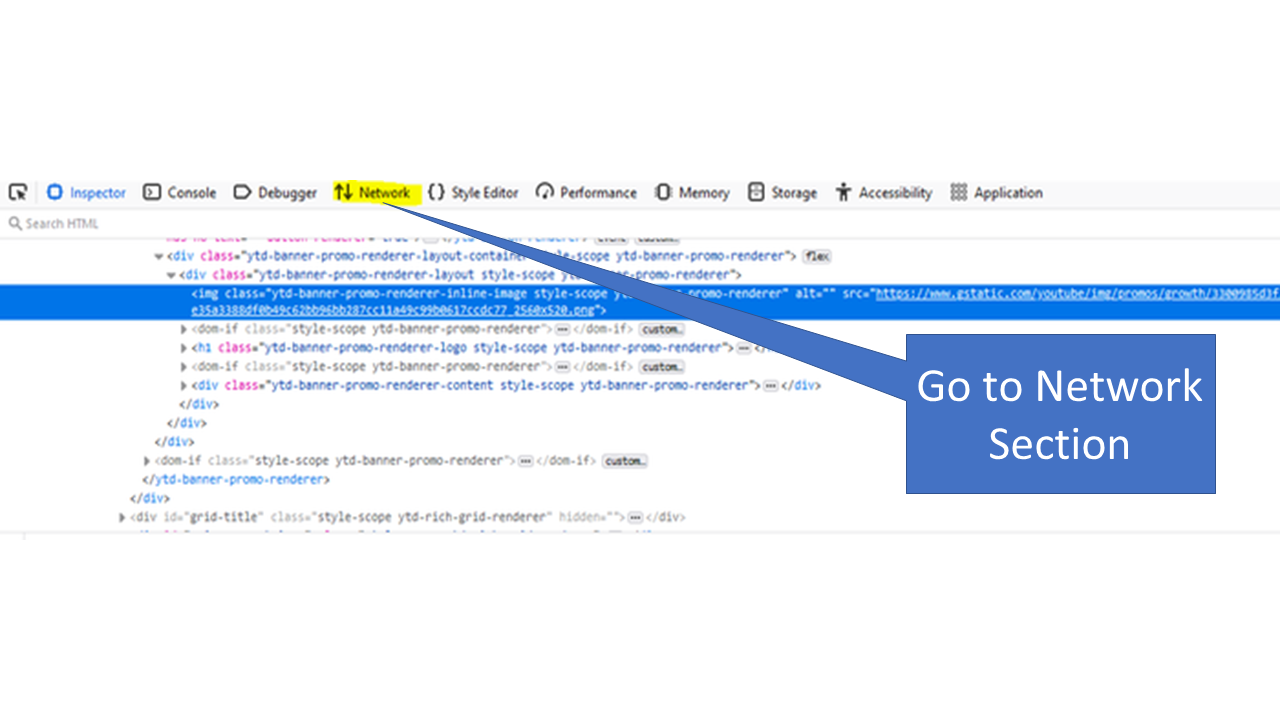
- Reload the page and select any field.
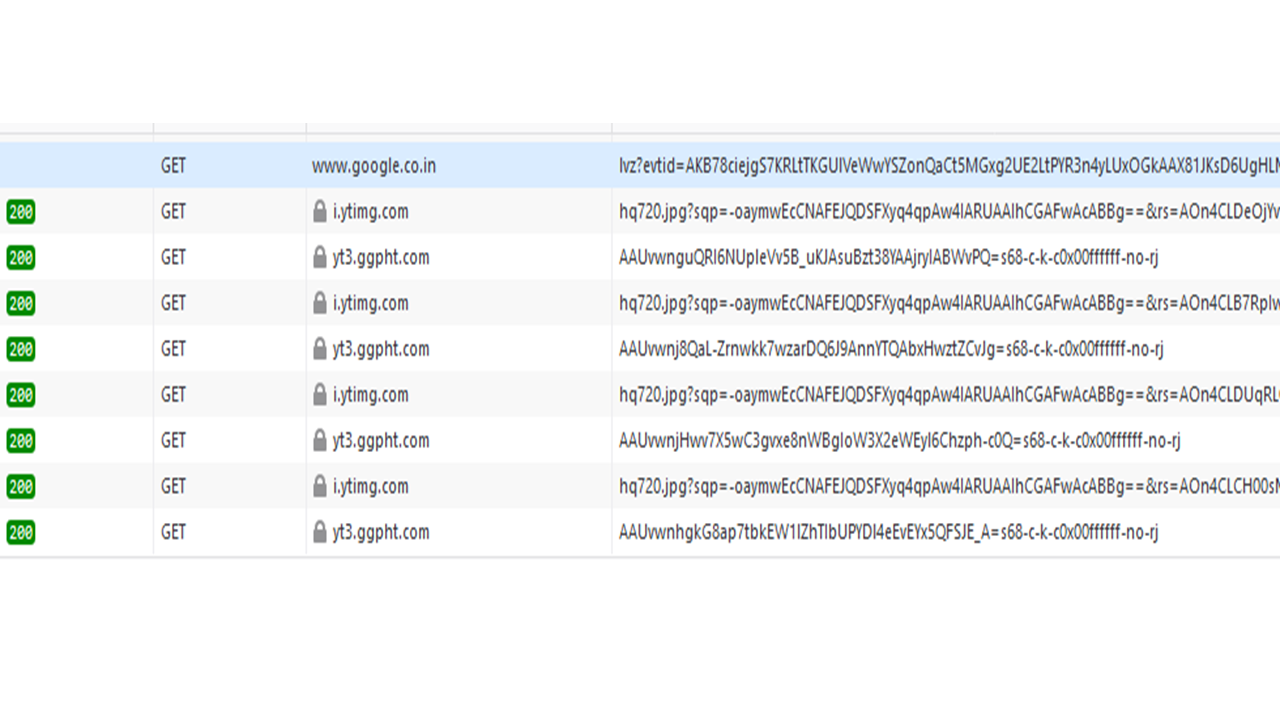
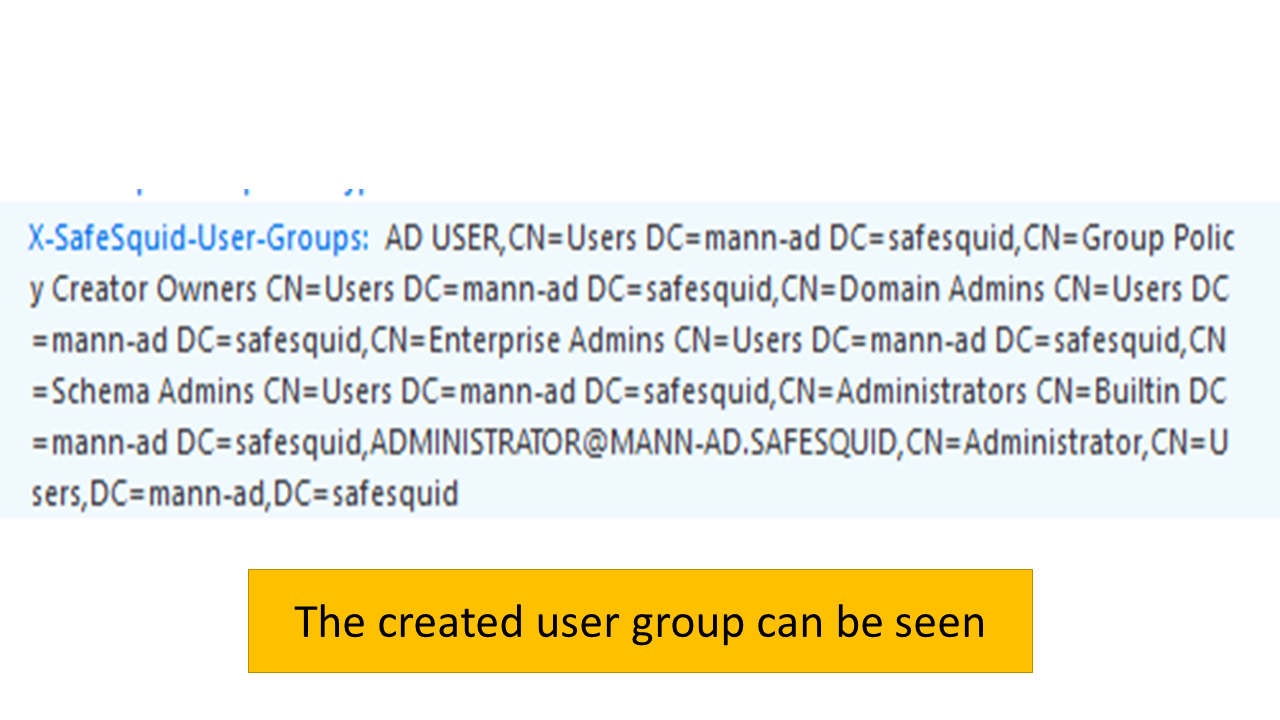
- You will see the usergroup which you have created.
Testing Kerberos SSO Authentication Setup
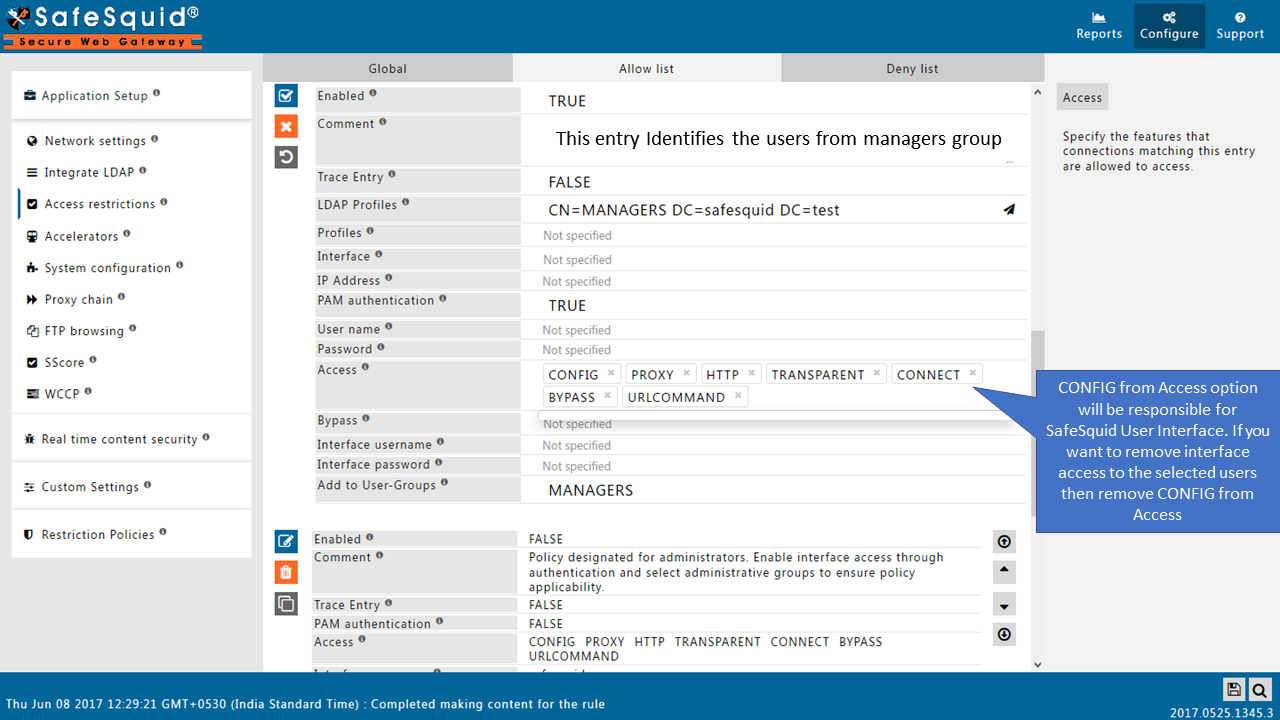
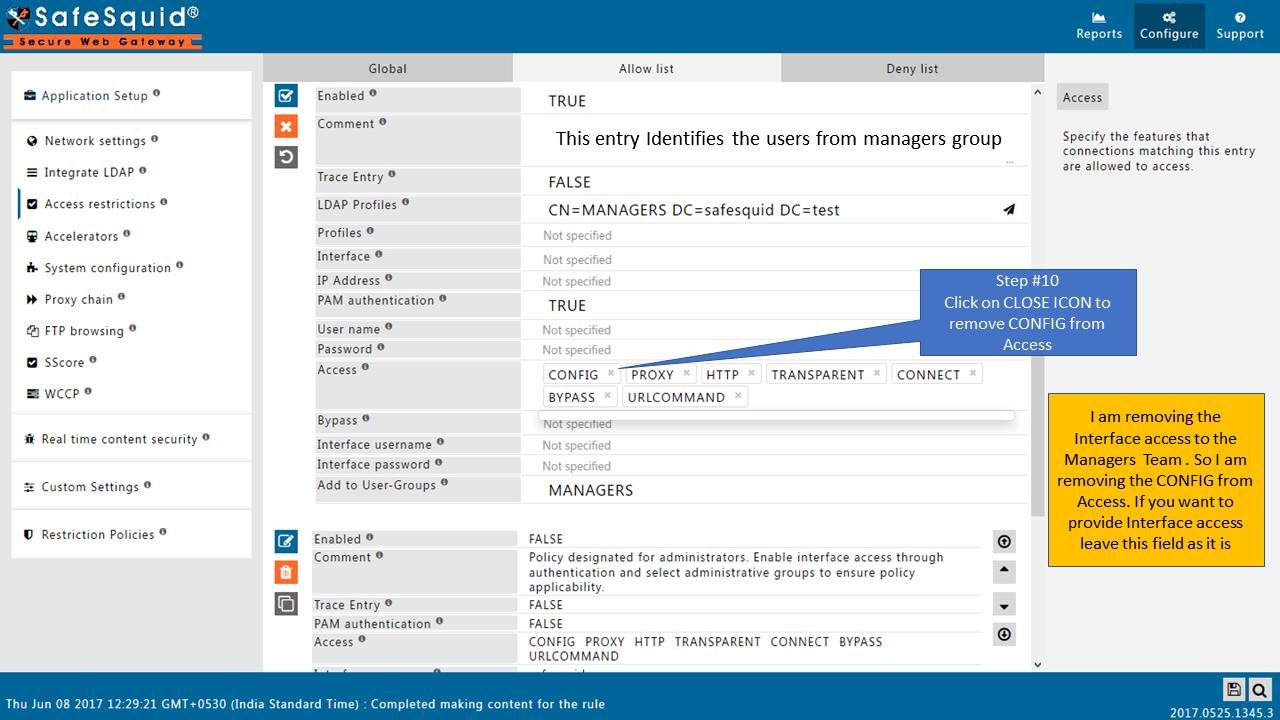
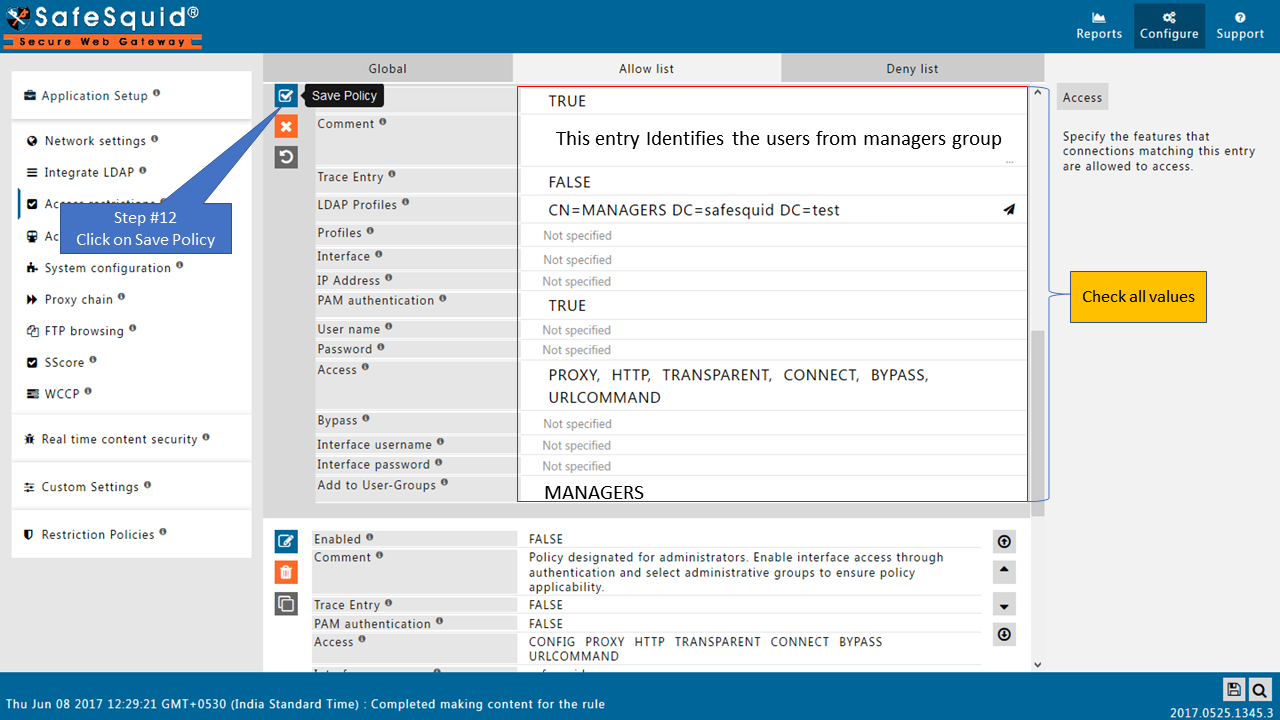
Configure Authentication in SafeSquid's Access Restrictions
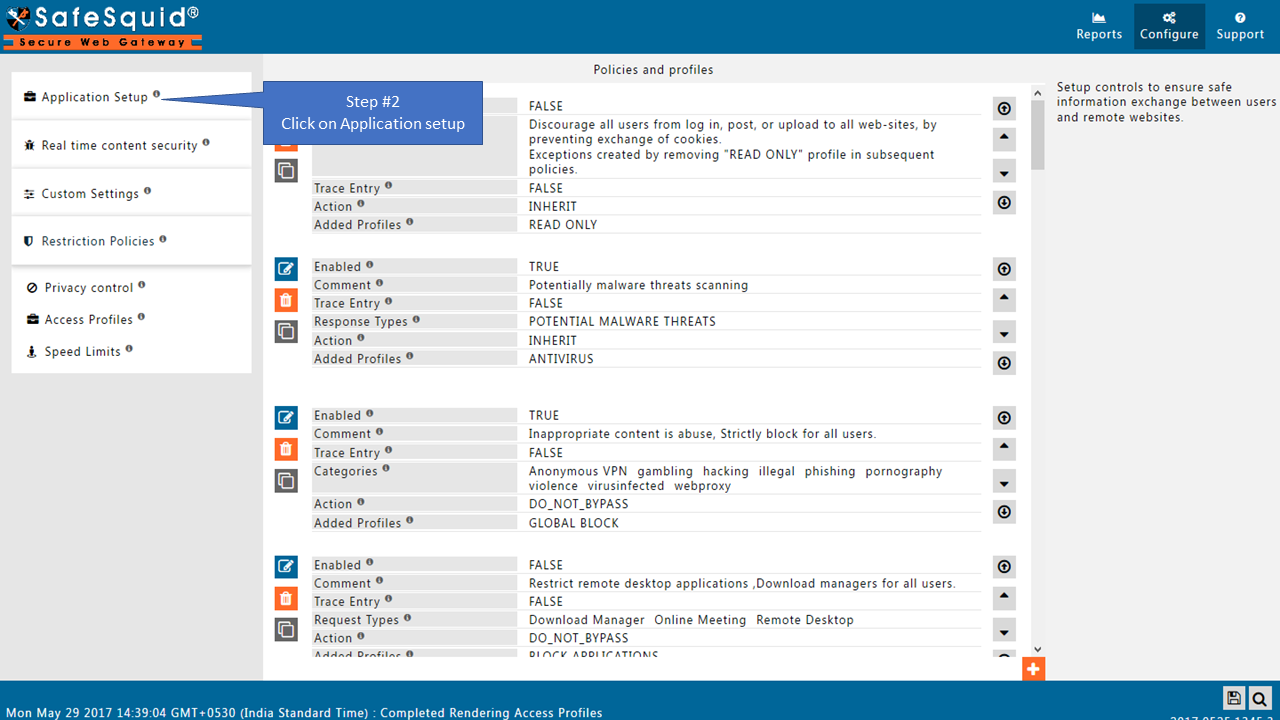
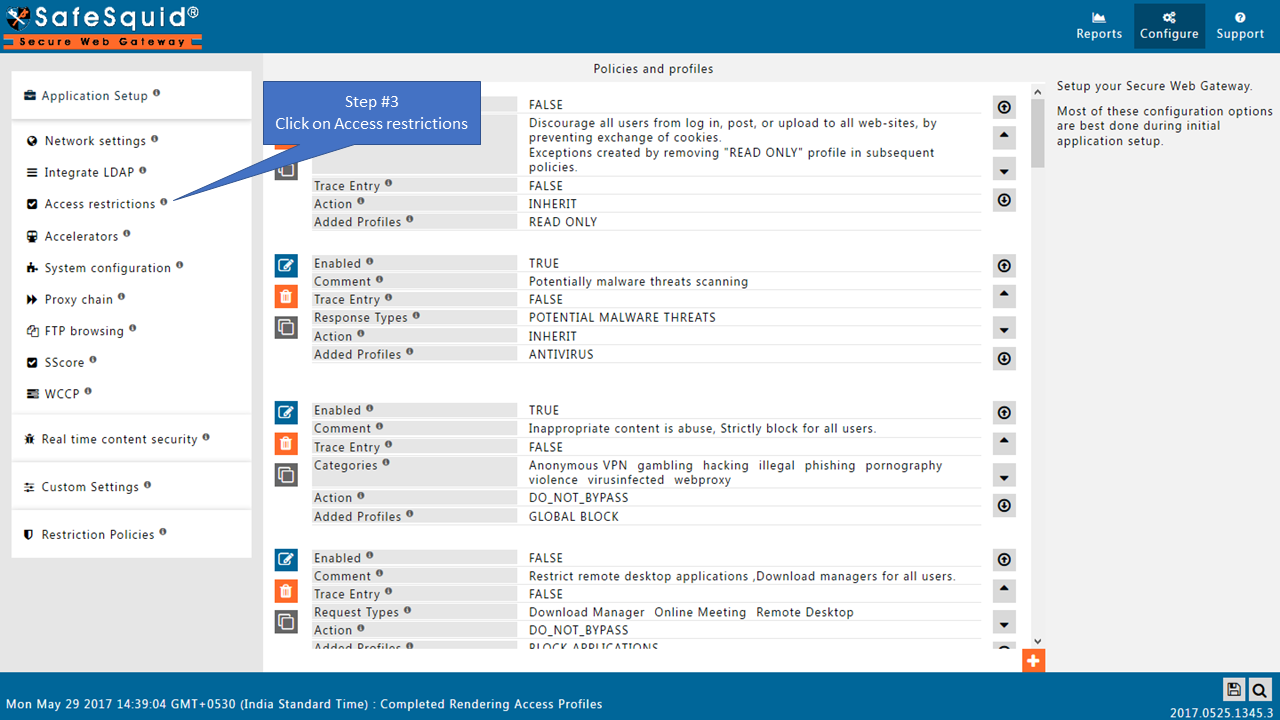
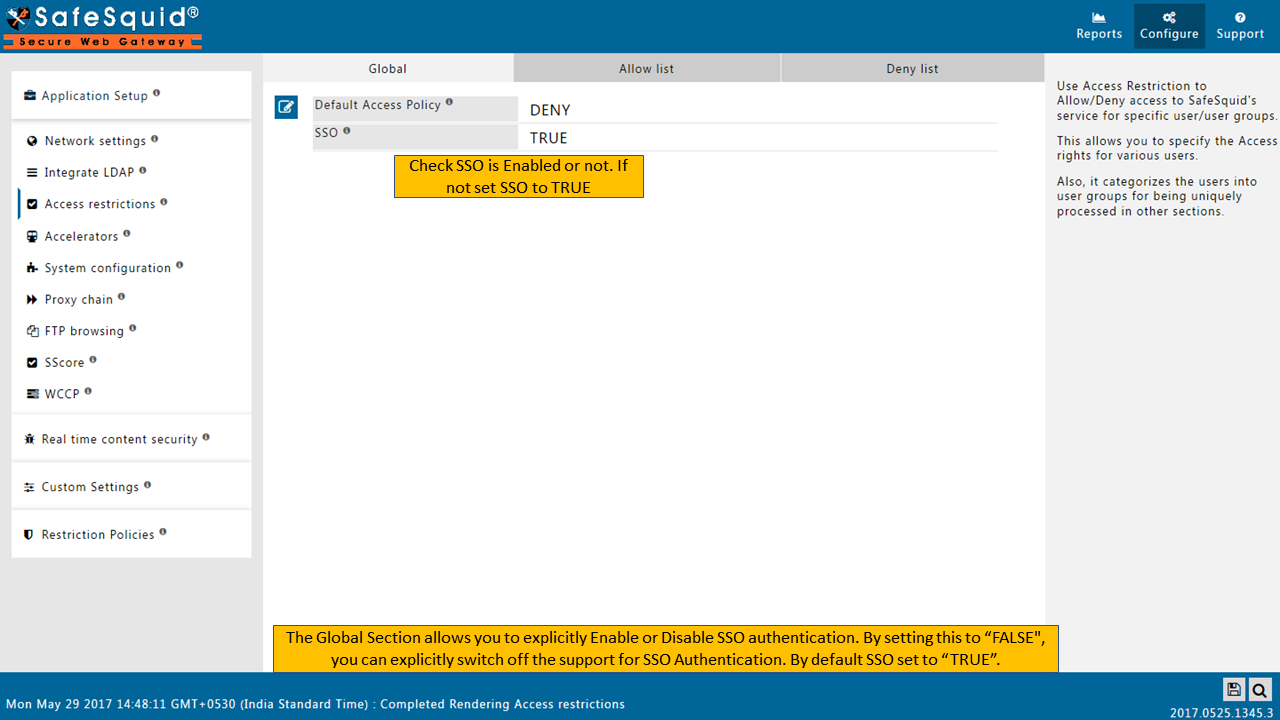
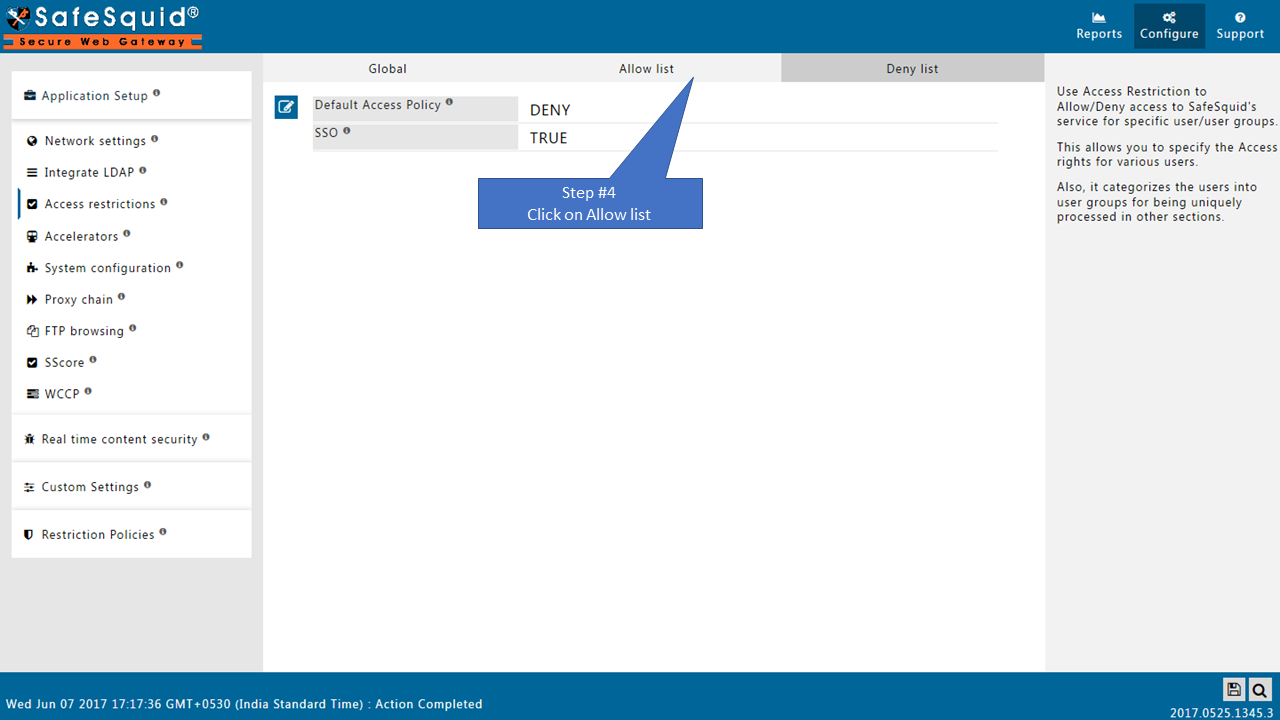
SafeSquid's WebGUI is used to create/modify policy configuration. We can access the WebGUI from any authorized system, depending on Access Restrictions configuration section (by default ALL are allowed). To ensure that we do not get locked up, we will in the following steps configure the Access Restrictions section of SafeSquid to enable the SSO authentication, and then to enable authentication for only our Test Client windows7.safesquid.test (My client machine). You may choose AD browser for testing purpose.
My Test Client machine: windows7.safesquid.test (Connect in your domain and should able to resolve. Verify time synchronization)
Configure your Internet browser to use sabproxy.safesquid.test : port_usually_8080 as your proxy server.
You should NOT be using the IP address: port format now. Always use FQDN of Proxy Server
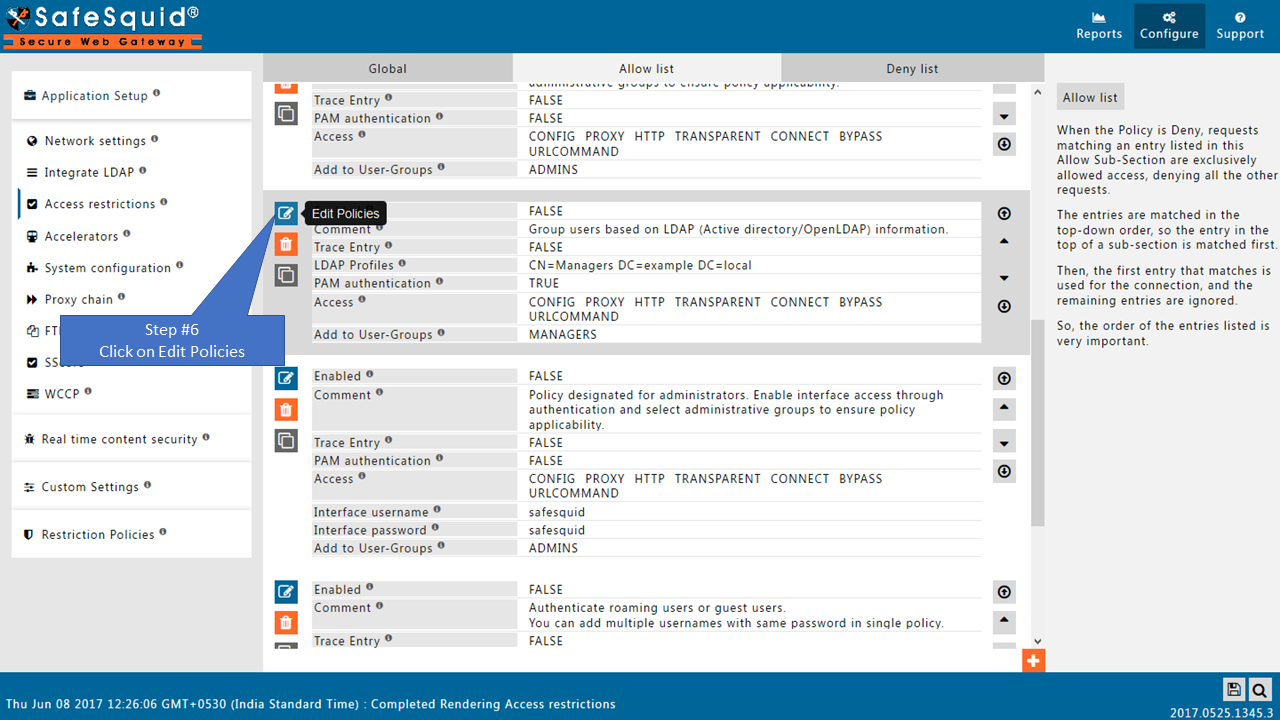
Access the SafeSquid User Interface
Go to Configure Page

Go to Application Setup
Go to Access Restrictions
Enable SSO Authentication
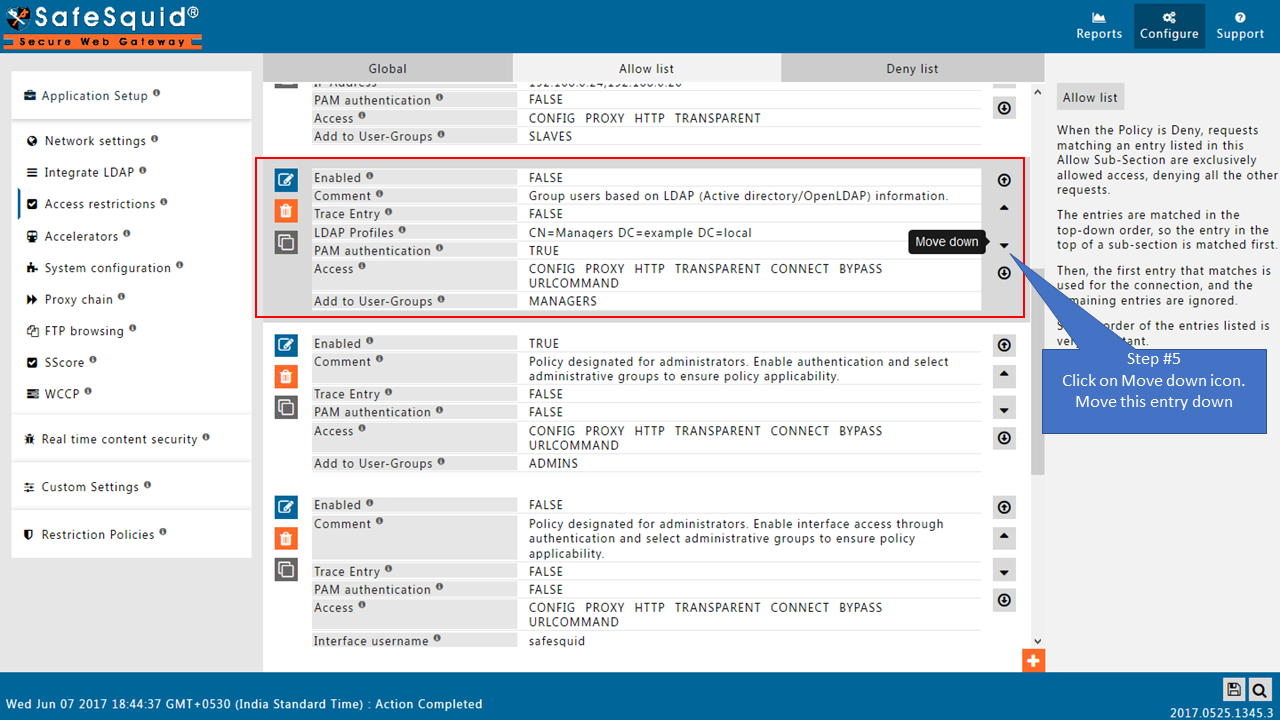
Go to Allow list
Change the order of Default entries
To avoid locking yourself to the SafeSquid User Interface.
See the working of each default Entry here
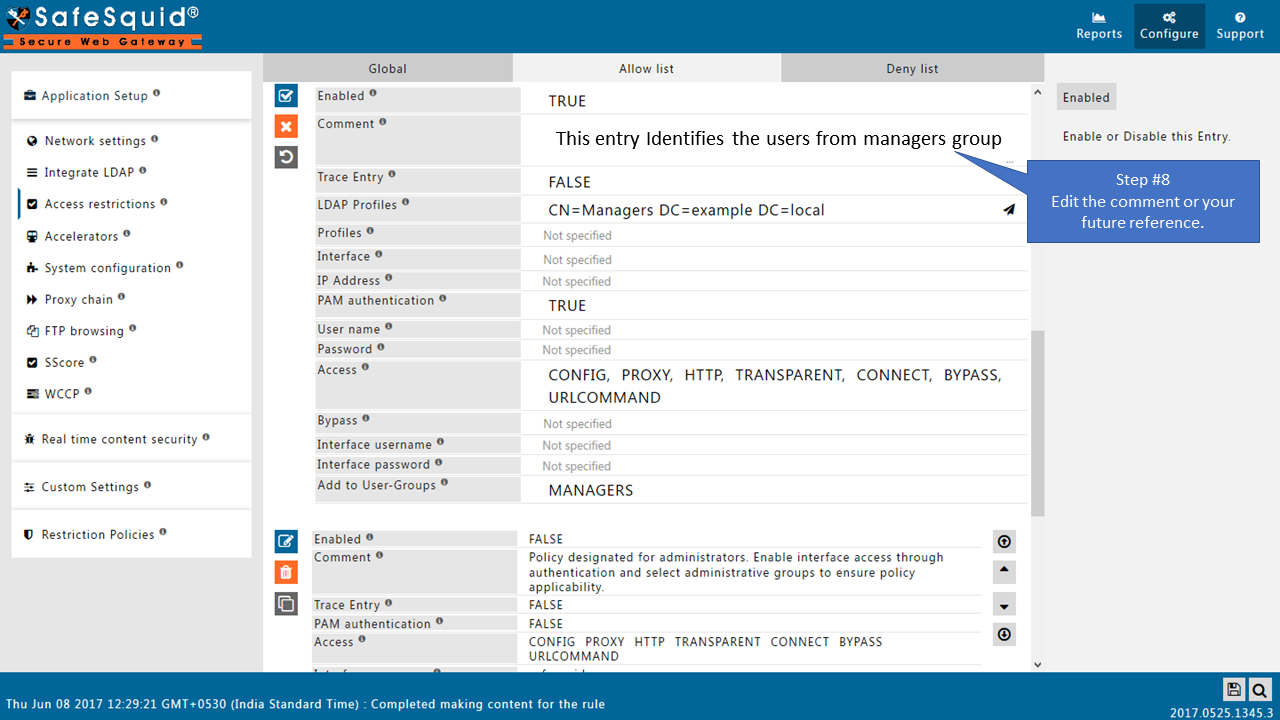
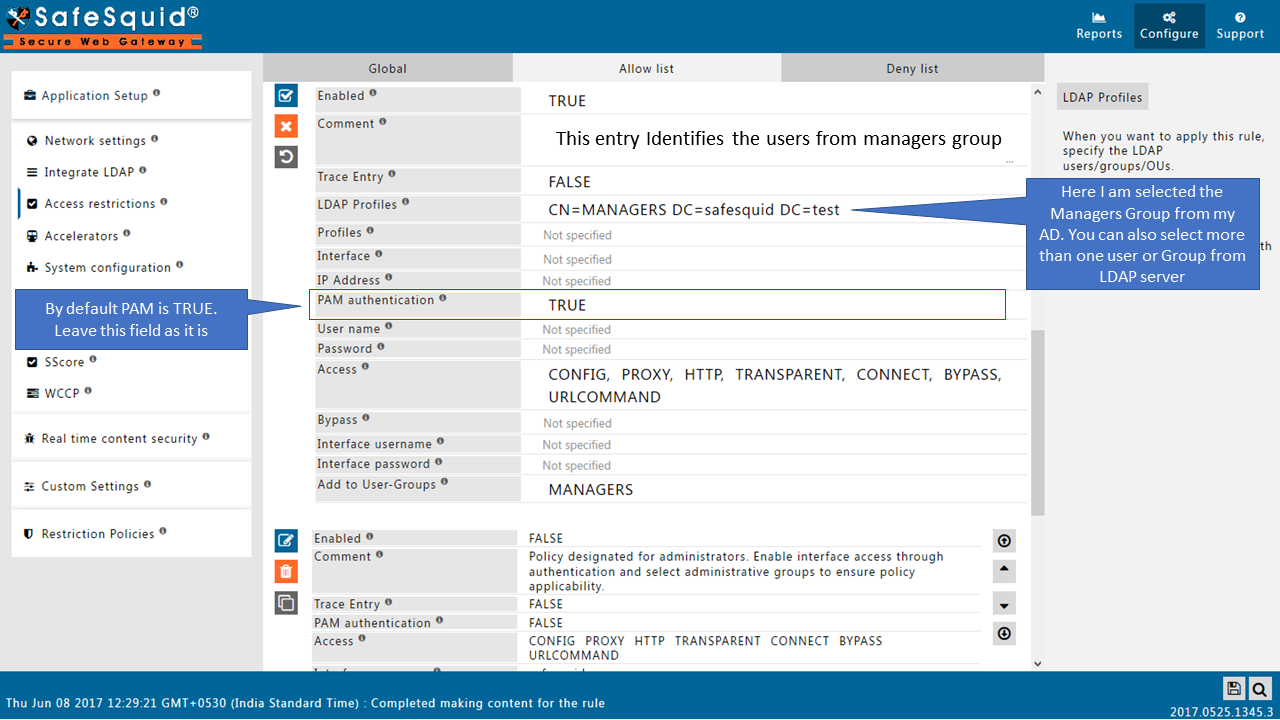
Add LDAP users

If your LDAP server is not integrated then you will not see any users list in the drop-down menu.
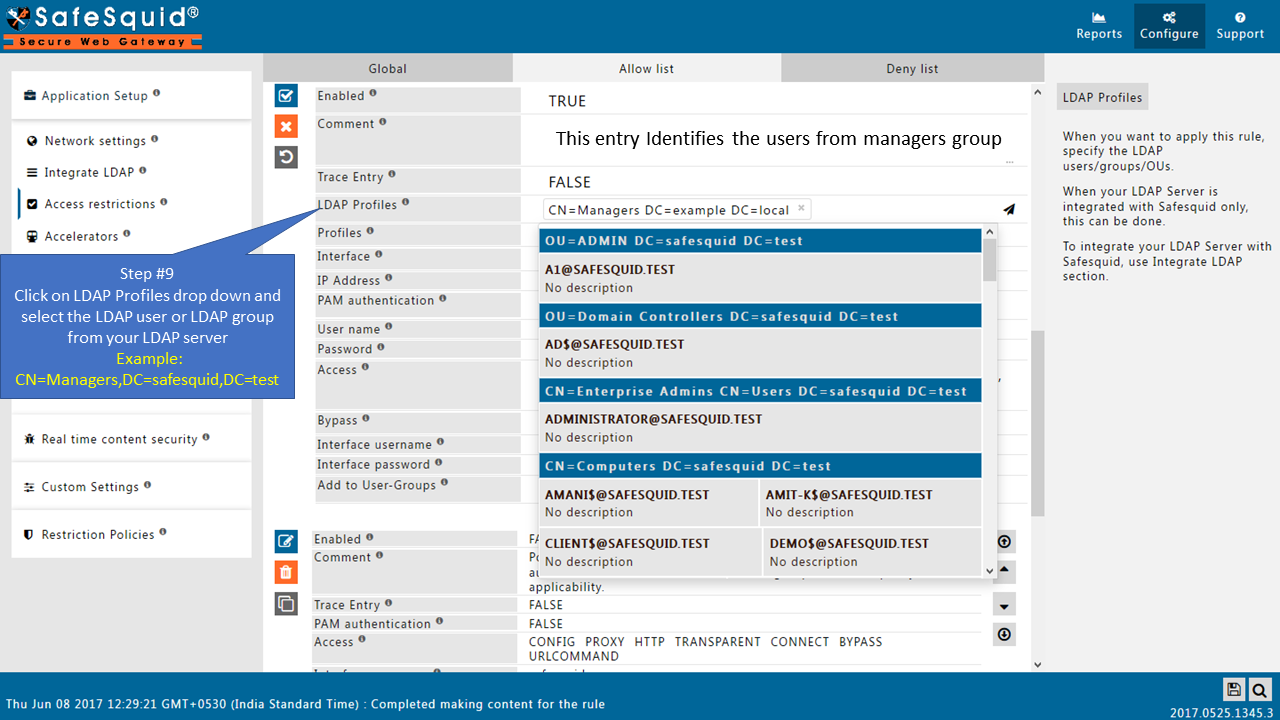
Here I am selecting the manager group from my AD so this policy will only applicable for the users from this group (manager group).
If you want to apply rule for all the users, then keep this entry blank.
Access the internet, confirm that you can access the web the way should be. '('It should not ask you for authentication prompt)
Take a look at the output of the tail command that you had earlier left running on the Linux console.
You will see request from the user that had logged into the windows7.safesquid.test system and the user should be getting identified as username@SAFESQUID.TEST@ 192.168.221.212
On the console leave this tail command running.
tail -f /opt/safesquid/safesquid/logs/extended/extended.log
Here we will be validating the SSO authentication, and the log lines here will reveal the success of our undertaken steps.
If you can confirm that, hurrah you are done!
To enable Windows Integrated authentication for the rest of your enterprise, modify the entry you created in the Access Restrictions for IP 192.168.221.212 and simply leave the IP address field blank.